
TL;DR — 2026 channel optimization checklist
- @handle is directly searchable — pick one that signals your niche, not just your channel name.
- Channel banner: upload at least 2048×1152 pixels with key text inside the 1235×338 px safe area; max 6 MB.
- Profile picture: at least 98×98 pixels, under 4 MB, PNG or GIF (no animations).
- Description: primary keyword in the first 50 characters; first 100 characters surface in Google search snippets.
- Featured sections + playlists control what new visitors see first and signal topical authority.
- Channel tags have minimal ranking impact in 2026 — deprioritize and invest the effort in description, video metadata and playlist structure instead.
- An active channel (regular uploads plus live streams) outranks a sporadic one — consistency is a channel-level signal.
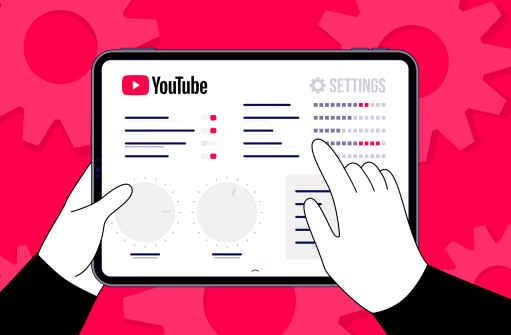
YouTube Handle Optimization
The @handle is now the primary way YouTube identifies your channel across Search, Shorts, comments and mentions. Unlike the older custom URL, a handle is unique, directly searchable and shareable as a short link (youtube.com/@yourhandle). Choosing it well is one of the highest-leverage moves you can make on the channel page.
A few rules of thumb for picking a handle:
- Reflect your niche, not just your channel name — @MorningRoastCoffee beats @JohnsmithVlogs for someone searching coffee content.
- Keep it 3–30 characters, alphanumeric plus dots, underscores and hyphens. No spaces.
- Match it across platforms (Instagram, TikTok, X) so audiences recognise you instantly.
- Avoid numbers stand-ins for letters — they hurt recall and look spammy in mentions.
To set or change your handle in 2026:
- open YouTube Studio;
- go to Customization → Profile;
- scroll to the Handle field and edit it;
- click Publish in the top-right corner.

You can change your handle twice within a 14-day period. YouTube holds your previous handle for 14 days in case you want to switch back, so test before committing.
YouTube Profile Picture Customization
You can only make a first impression once, so your profile picture deserves real thought. It sits next to every video, comment and reply you ever post.
Each user will see this image under all your videos and comments, so pick something that reflects your personality and theme: food photography on a cooking channel, a clean face shot for a personal brand, a sharp logo mark for a media property. Choose an image you won't need to change often, since famous brands have kept their logos consistent for decades and recognition compounds.
Use only high-quality images that you have the right to use. If you shoot your own photography, make sure it reads professional at small sizes, since the picture renders as a circle and gets very small in comments. Unique channel branding is often why a random visitor decides to subscribe.
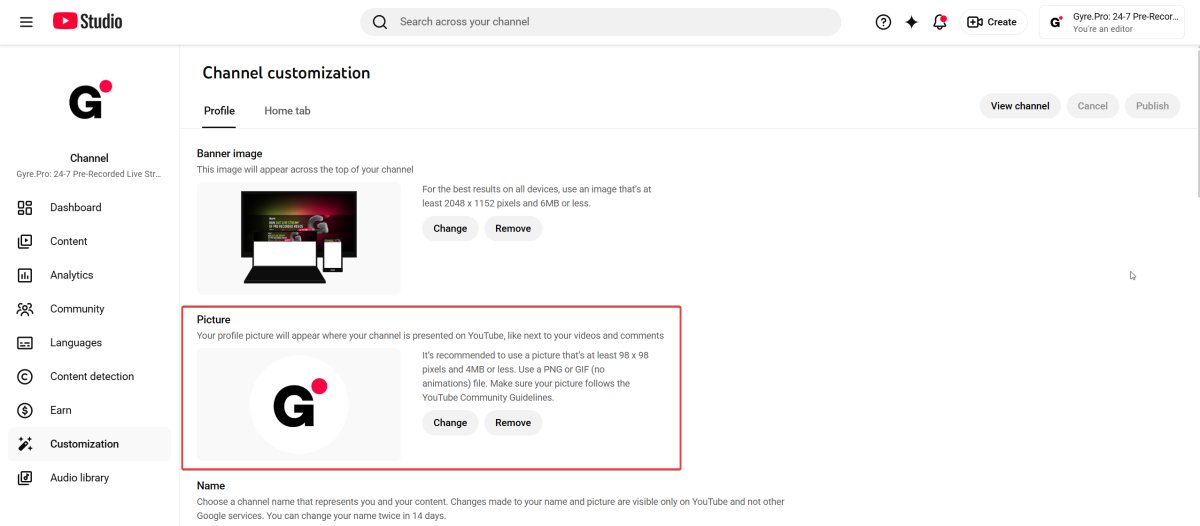
According to YouTube Studio's official recommendation, your profile image should be:
- at least 98 × 98 pixels;
- under 4 MB;
- PNG or GIF (no animations);
- compliant with YouTube Community Guidelines.
The image renders as a circle in the YouTube interface, so design with a centred subject and avoid critical detail in the corners.
To upload a profile picture on desktop:
- open YouTube Studio and click Customization in the left menu;
- stay on the Profile tab;
- under Picture, click Change;
- upload your image, crop the preview, and click Done;
- click Publish in the top-right corner.
On mobile:
- tap your channel icon;
- tap the edit (pencil) icon;
- tap your profile picture;
- choose or take a photo and tap Save.
YouTube Banner Image Customization
Your banner is the large image at the top of your channel page that frames who you are: your show schedule, your tagline, your social handles, your launch date. If you run an online store, it doubles as a billboard.
You can also add up to five active link icons (social profiles, store, website) that overlay the banner on the bottom-right. In YouTube Studio, go to Customization → Profile → Links, click Add link, fill in the title and URL for each, and choose how many show on your banner. These links display on desktop and mobile in current YouTube channel pages.
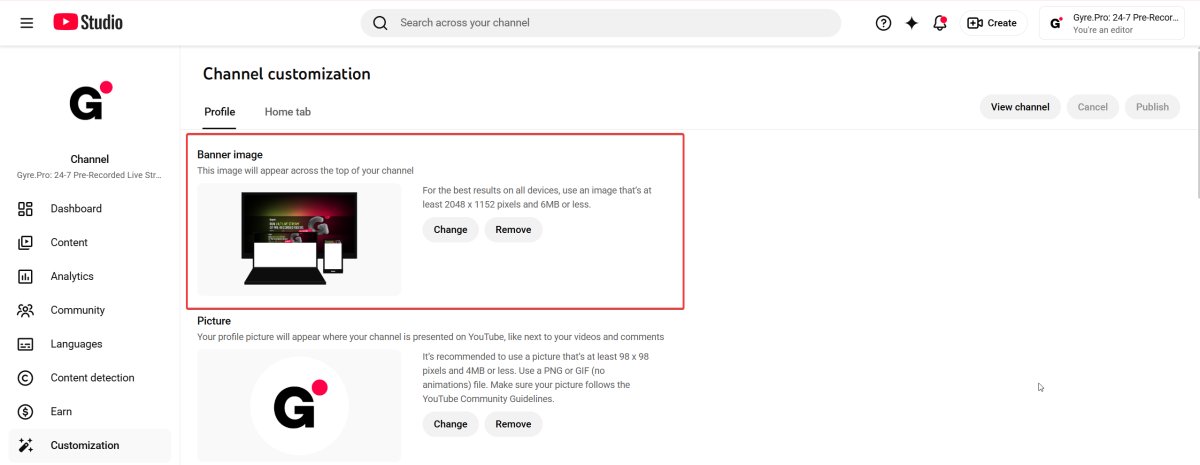
2026 banner specs (from YouTube Studio):
- Recommended upload size: at least 2048 × 1152 pixels (16:9), so the image looks crisp on smart TVs and large desktops.
- Safe area visible on every device: the central 1235 × 338 pixels — keep all logos, text and key visuals inside this zone or they'll get cropped on mobile.
- Maximum file size: 6 MB.
- Formats: PNG (preferred for text and logos), JPG (best for photos), BMP, or GIF (no animations).
YouTube uses a single banner file and crops it differently per device. Mobile crops the most aggressively, desktop shows a wide strip across the top, and smart TVs display the full canvas, so design from the centre outward and treat anything beyond the safe area as decorative background only.
To upload a banner from desktop:
- open YouTube Studio and click Customization;
- on the Profile tab, find the Banner image section at the top;
- click Change and upload your file;
- adjust the crop preview to confirm how the banner looks on desktop, TV and mobile, then click Done;
- click Publish in the top-right corner.
On mobile:
- tap your channel icon;
- tap the edit (pencil) icon;
- tap the banner image;
- select a file and tap Save.
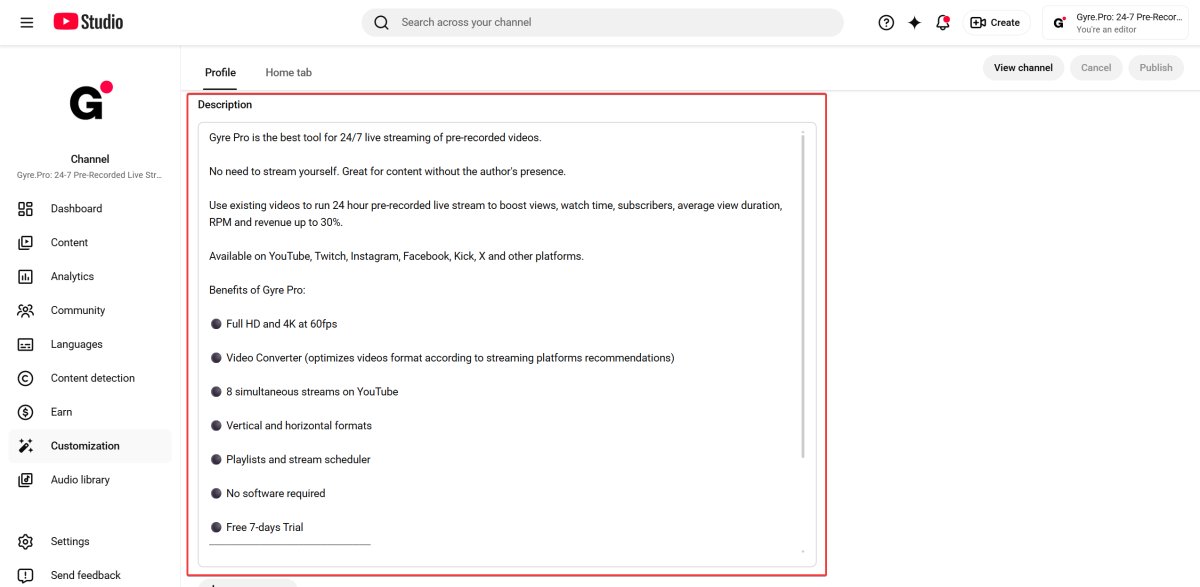
YouTube Channel Description Customization
Your channel description is the About section — a short, indexable statement of who you are, who you serve and what they'll get if they subscribe. It's also one of the most underused growth levers on the page.
Two things matter here: the first 100 characters of your description appear in Google search snippets when your channel ranks, and the description is fully indexable by both YouTube Search and Google. That makes the first sentence double SEO duty as a ranking signal and a click-through pitch.
Concrete writing rules that beat generic “SEO-friendly” advice:
- Put your primary keyword in the first 50 characters — that's the part both AI Overviews and Google snippets see first.
- Lead with a one-line value proposition: who you help and how. Skip the corporate preamble.
- Use 200–300 words of contextual content under the lead — enough for the algorithm to understand your topic cluster.
- Avoid keyword stuffing. YouTube flagged this as a bad practice in 2024 and it now risks suppressing rather than helping you.
- Drop in 3–5 related terms (co-occurring topics, not synonyms) so the algorithm sees topical breadth, not repetition.
Hashtags still help video-level discovery but on the channel page, prioritise a clear, keyword-led description over hashtag clusters. For broader keyword research, tools like TubeBuddy, vidIQ and Google Search Console can help you optimize keywords for your niche.
On the public channel page, the description now lives in a drop-down — viewers expand it by clicking the arrow next to your channel name on desktop or tapping the “…more” link on mobile.
To add or edit your description:
- open YouTube Studio and click Customization;
- stay on the Profile tab;
- scroll to Description and write your copy;
- click Publish in the top-right corner.
Channel Home Page Layout Strategy
The channel home page redesign rolled out across 2024 changed the rules: visitors now land on a layout you actively shape, not a passive feed. The Home tab inside Customization controls everything — a Layout section where you customise up to 12 sections, including your channel trailer, a featured video for returning subscribers, the For You personalised shelf, and your featured sections (single playlists, multiple playlists, recent uploads, Shorts shelf, live streams, members-only).
Treat the home page as a conversion funnel. A first-time visitor should see, in this order: who you are (channel trailer), what kind of content you make most often (top playlist or Shorts shelf), and proof you're active (recent uploads or live streams). A returning subscriber should land on something new, which is what the Featured video for returning subscribers and For You sections handle.
Adding a channel trailer
A trailer under 90 seconds tends to lift subscriber conversion by 5–15% for new visitors. It shows non-subscribers what you make and why to follow you, and trailers don't carry pre-roll ads by default, so there's no friction between visitor and pitch.
To add a trailer:
- open YouTube Studio and click Customization;
- switch to the Home tab;
- in the Layout section, find Channel trailer for people who haven't subscribed;
- click the three-dot menu and select Change video;
- pick the video, then click Publish in the top-right corner.
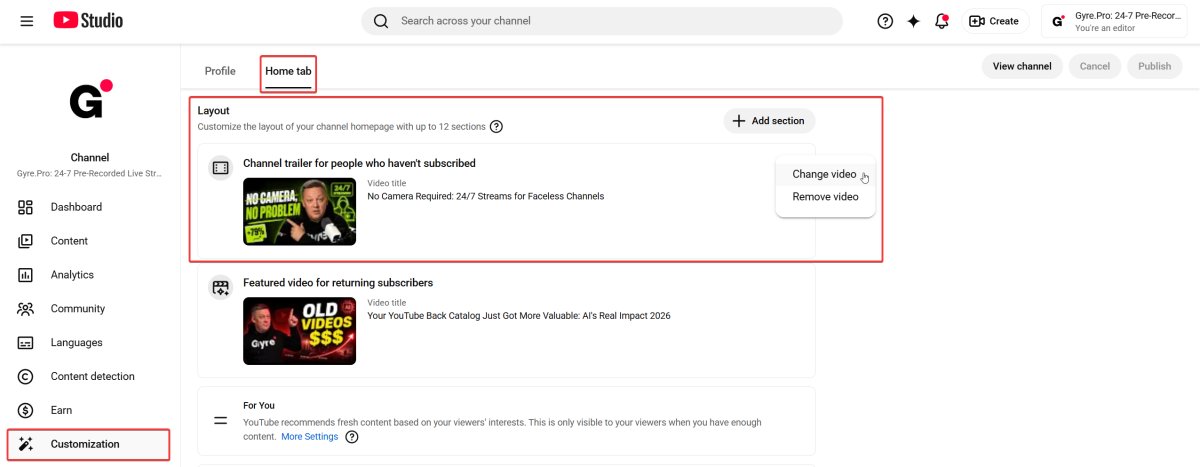
Setting a featured video for returning subscribers
Below the trailer slot, you can pin a separate Featured video for returning subscribers — usually your latest upload or a piece of content you actively want to promote (a new series launch, a milestone video, a community Q&A).
- open Customization → Home tab;
- in the Layout section, find Featured video for returning subscribers;
- click the three-dot menu and select Change video;
- choose the video and click Publish.
Customizing the “For You” section
The For You shelf shows personalized recommendations from your channel to each viewer based on their watch history. It only appears once you have enough content for YouTube to recommend, and you can constrain what types of content show up.
- open Customization → Home tab;
- find the For You section in your layout;
- click More Settings;
- pick which content types to display, toggle the 12-month filter if your back catalogue is dated, then click Done;
- click Publish.
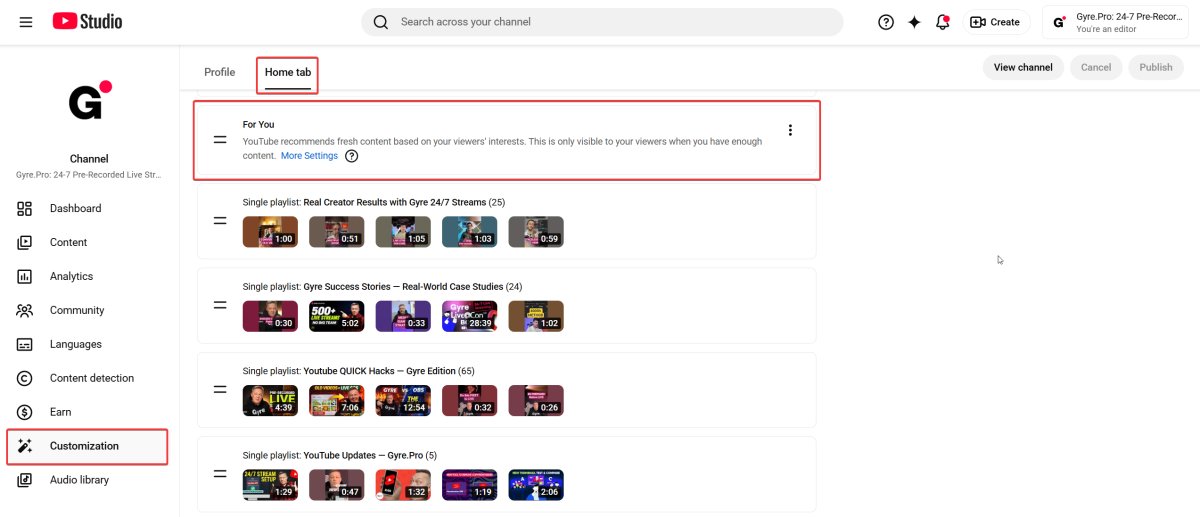
Ordering featured sections (playlists, Shorts shelf, live)
Below the trailer and featured video, you can add and reorder up to 12 sections total — single playlists, multiple playlists, the Shorts shelf, popular uploads, live streams and more. Drag the handle on the left of each section to reorder. Order matters: viewers rarely scroll past the third section on mobile.
A common high-converting order for a niche channel: trailer → top playlist (your strongest topical series) → Shorts shelf → live streams → recent uploads → secondary playlists. If you run continuous 24/7 broadcasts via a tool like Gyre's pre-recorded live streaming, the live section becomes an always-on entry point for new viewers and a steady session-time signal for the algorithm.
Strong playlist titles and descriptions are indexable in both YouTube and Google Search — see our guide on how to create a playlist on your YouTube channel for the full setup.
Channel Optimization Priorities: What to Tackle First
Not every channel element pulls equal weight. The table below maps each piece to its SEO impact and the realistic time it takes to fix — useful when you have an hour rather than a weekend.
| Channel element | What to optimize | SEO impact | Time to implement |
|---|---|---|---|
| @handle | Niche-relevant, short, consistent across platforms | High — directly searchable | 5 minutes |
| Channel description | Primary keyword in first 50 characters; 200–300 words total | High — indexable in Google & YouTube | 30–45 minutes |
| Featured sections order | Trailer → top playlist → Shorts → live → recent | Medium — affects session watch time | 20 minutes |
| Channel banner | At least 2048×1152; key text inside 1235×338 safe area | Medium — brand signal, not ranking | 1–2 hours (design) |
| Profile picture | At least 98×98, PNG/GIF (no animations), recognisable as a small circle | Low–medium — CTR & brand | 30 minutes |
| Playlists | Keyword-led titles, 2–3 sentence descriptions | Medium — topical authority signal | 15 minutes per playlist |
| Channel tags | Light coverage; deprioritise | Minimal in 2026 | 5 minutes |
| Upload consistency | Regular uploads + active live streams | High — channel authority signal | Ongoing |
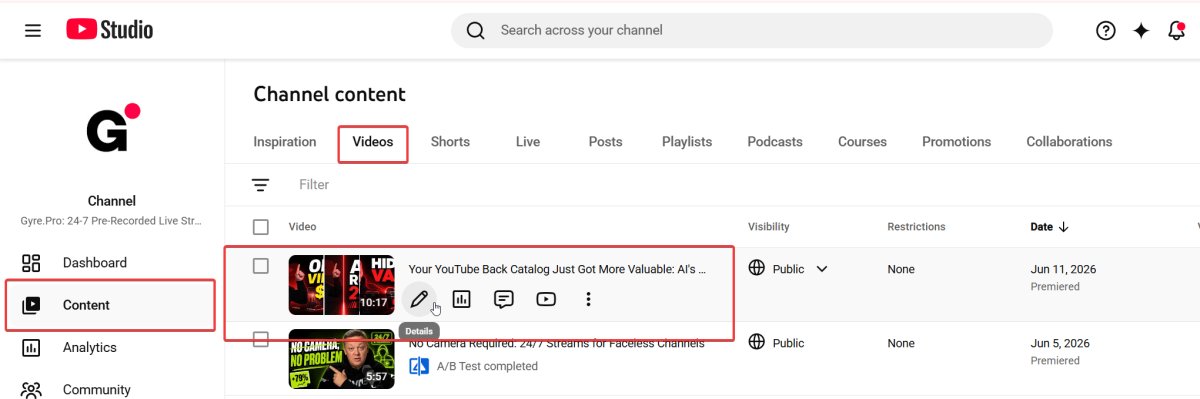
Adding Thumbnails to YouTube Videos
Thumbnails punch above their weight on the channel page: every grid view, every featured shelf, every search result is decided in part by the image. An attractive one converts impressions into views, and consistent thumbnail design ties the channel together visually.
You can use Canva templates for a quick start, but moving to Adobe Photoshop or Figma unlocks proper control over fonts, layers and on-brand colour palettes. Read more on how to make creative thumbnails and the mistakes that quietly cost creators views.
Thumbnail specs:
- 1280 × 720 pixels (16:9), minimum 640 px wide;
- under 2 MB for regular videos, under 10 MB for podcasts;
- JPG, GIF or PNG;
- 16:9 aspect ratio for correct display across desktop, mobile and TV surfaces.
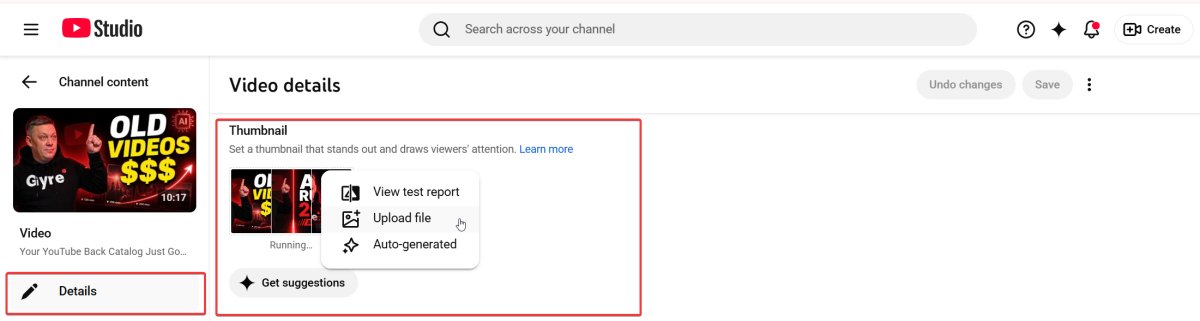
To add or change a thumbnail on desktop:
- open YouTube Studio and click Content in the left menu;
- on the Videos tab, hover over the video you want to edit and click the pencil Details icon;
- in the Thumbnail section, click the three-dot menu on the thumbnail and select Upload file;
- choose your image and click Save in the top-right corner.
On mobile:
- tap your profile icon and go to Your videos;
- select the video and tap the three-dot menu;
- choose Edit, then tap the thumbnail icon;
- pick an auto-generated thumbnail or upload a custom one;
- tap Save.
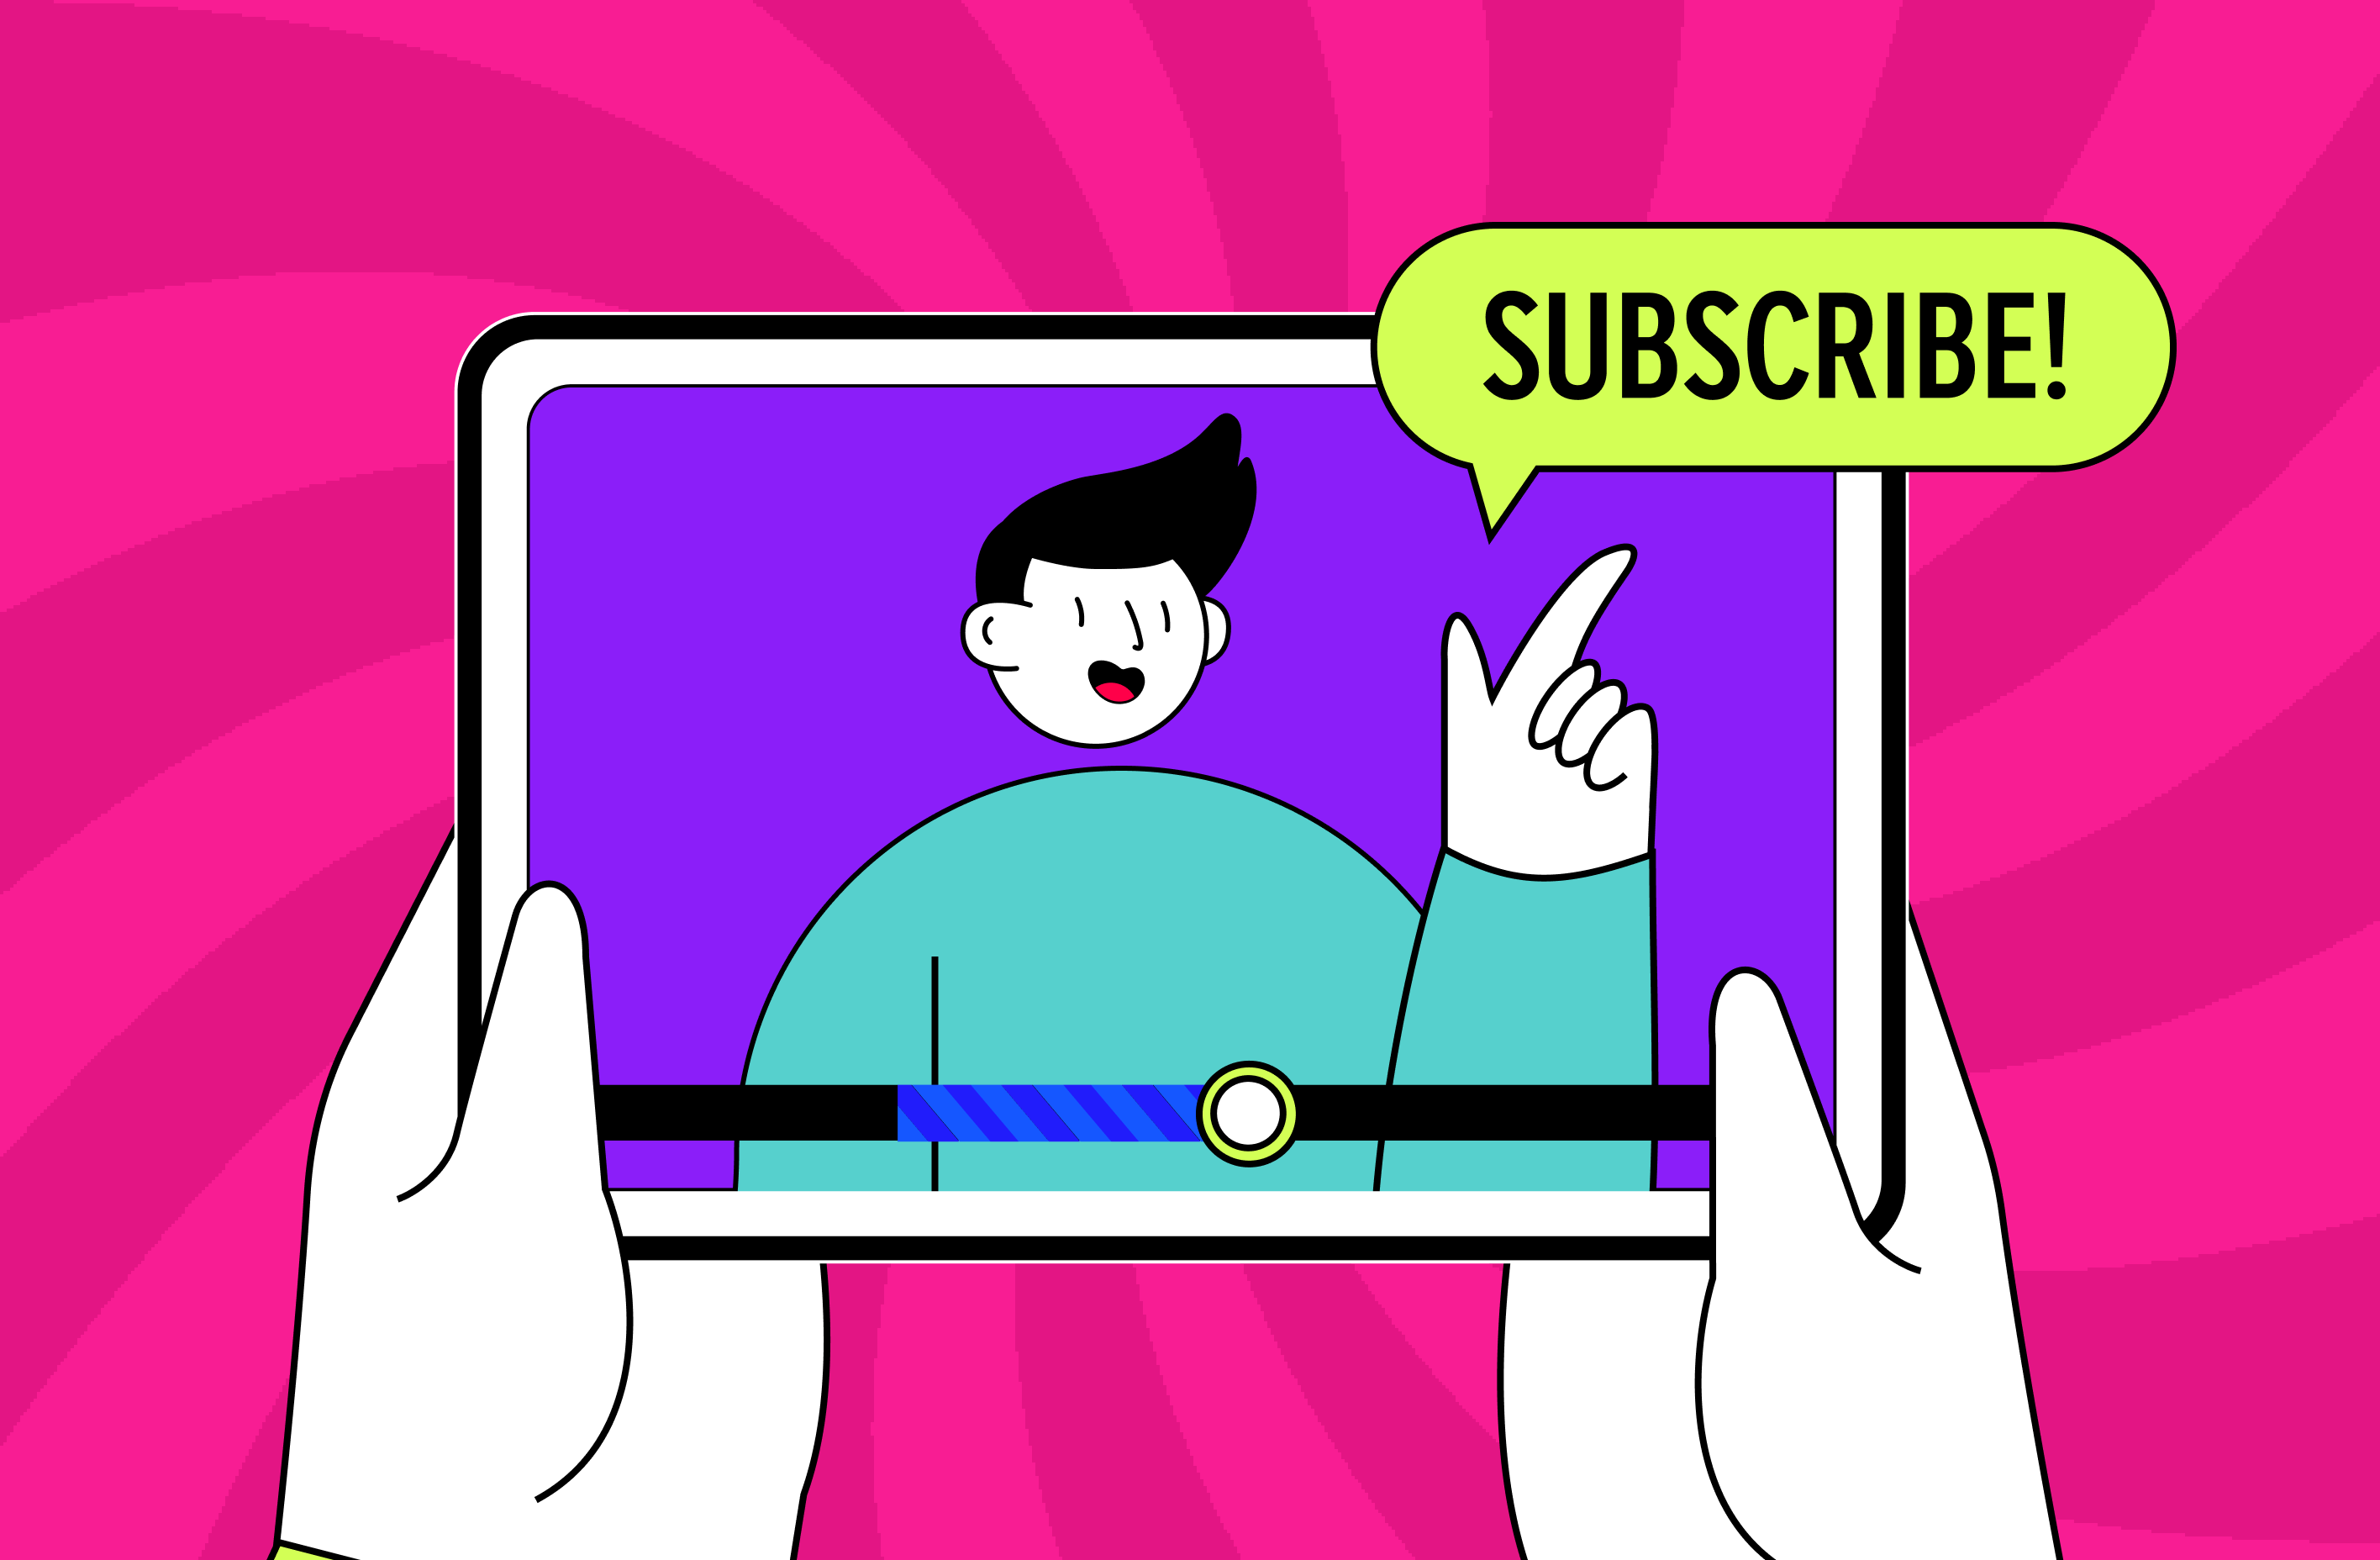
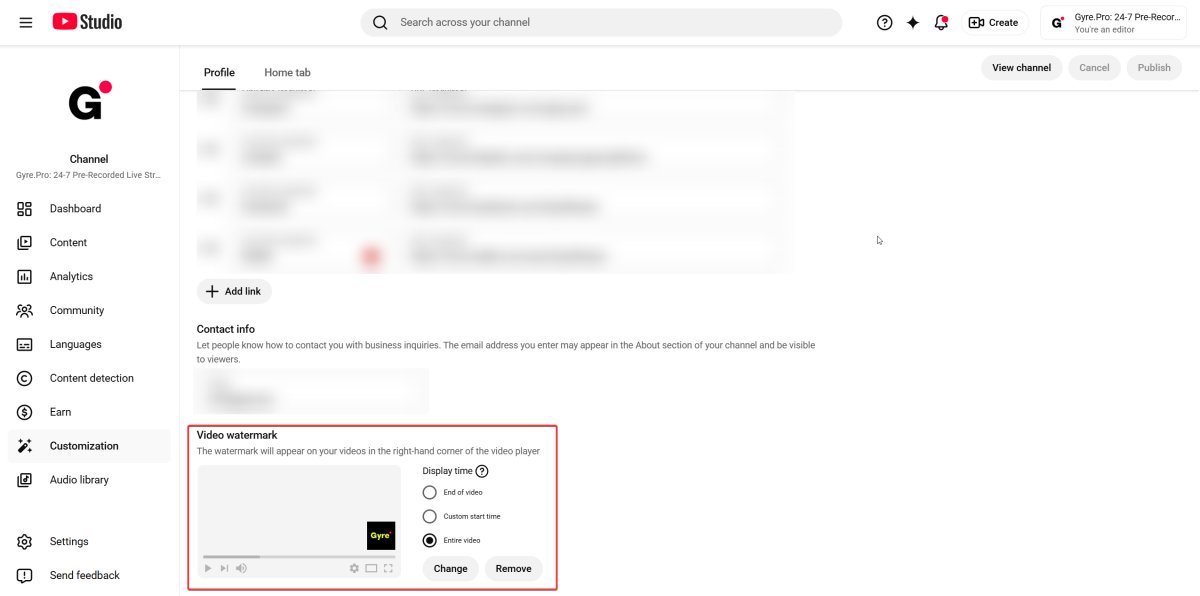
Adding a Custom YouTube Watermark
A watermark gives every video a consistent on-screen mark and doubles as a one-tap subscribe button overlaid on the video player. It's a small signal that compounds across thousands of views.
According to YouTube's official recommendations, a watermark should be:
- 150 × 150 pixels;
- under 1 MB;
- non-animated GIF, JPG, PNG or BMP.
You can upload a watermark from desktop only:
- open YouTube Studio and click Customization;
- on the Profile tab, scroll down to Video watermark (below Links and Contact info);
- click Change and upload your file;
- under Display time, choose End of video, Custom start time, or Entire video;
- click Publish in the top-right corner.
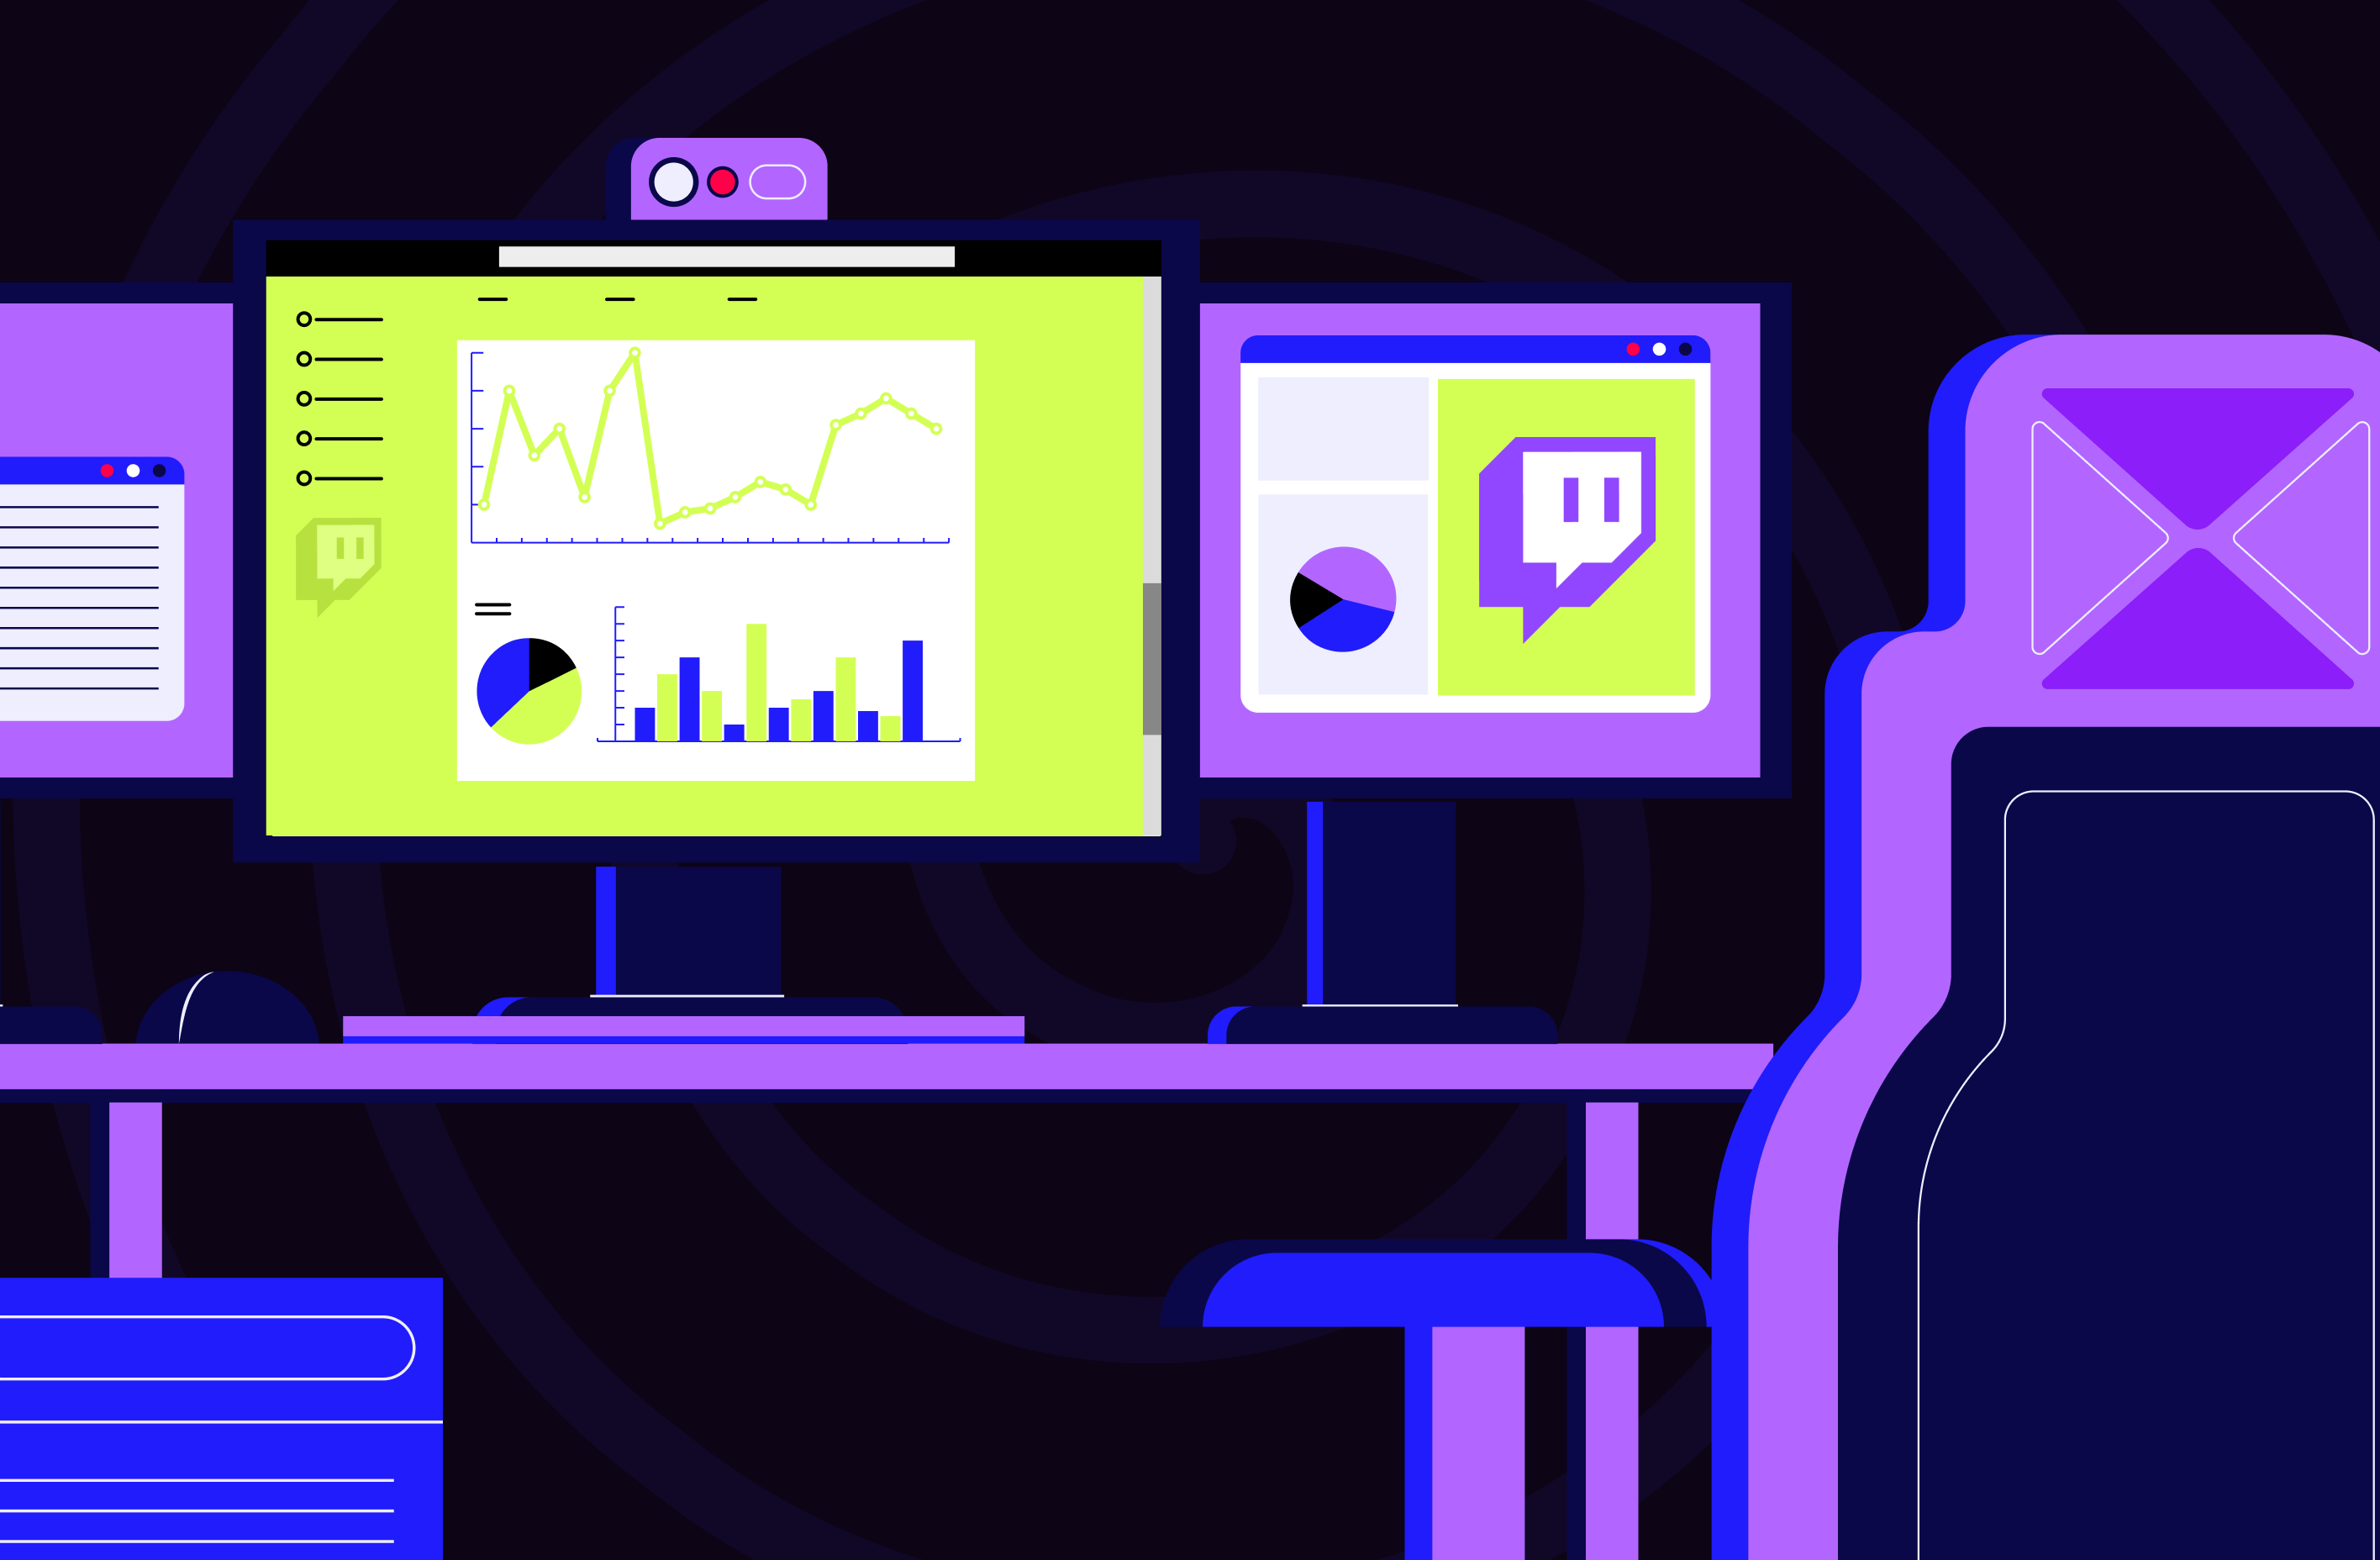
Connecting Google Search Console to Your YouTube Channel
Most creators stop their keyword research at TubeBuddy or vidIQ, but Google Search Console gives you something neither can: the actual queries that bring outside-YouTube traffic to your videos. Since channels and videos increasingly surface in Google's video carousels and AI Overviews, this is a free, first-party data source worth wiring up.
What Search Console gives you:
- the search queries Google users typed before clicking through to your channel page or video;
- impressions and CTR for each query — useful for spotting easy wins where you rank but barely get clicks;
- which pages on your channel are getting indexed and which are not.
The catch: you can only verify domains you control, not youtube.com itself. The workaround most creators use is to verify the website or landing page where they embed their videos and link to their channel, then read off the queries that pull traffic to embedded videos. If you self-host a blog or portfolio that links to your channel, set up Search Console there, and use the Performance → Search results report filtered to pages that embed YouTube videos.
Setup in three steps:
- go to Google Search Console and add your website as a property;
- verify ownership via DNS record, HTML file upload or Google Analytics;
- wait 48–72 hours for data, then open Performance → Pages and filter for URLs that embed your YouTube videos.
The keyword patterns you'll find here often differ from what TubeBuddy and vidIQ surface. They tilt toward longer, intent-led queries that Google rewards, which is exactly the language you want in your channel description and video titles.
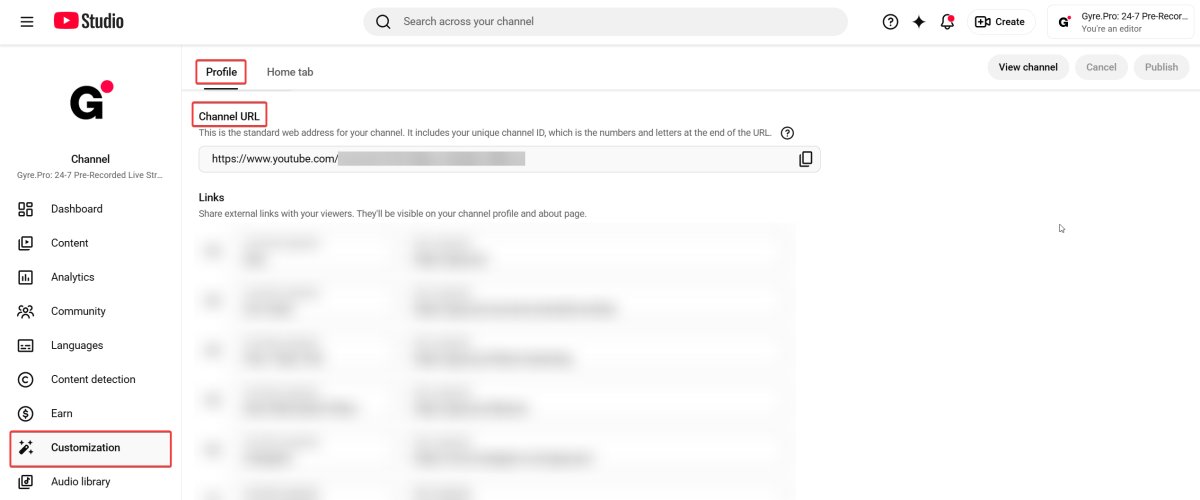
YouTube Channel URL
Since the @handle rollout, every channel has two URL formats. The first is the Channel URL — the standard web address that includes your unique channel ID (a long string of letters and numbers, e.g. youtube.com/UCxxxxxxxxxxxxxxxxxxxx). The second is your handle URL (youtube.com/@yourhandle), which is shorter, brand-aligned and the one to share publicly.
The Channel URL is read-only — you can't customise the ID portion, only copy it for embeds, API integrations or analytics tools. The shareable URL you actually want is the handle URL, which you control in the Handle field (see the YouTube Handle Optimization section above).
To find your Channel URL and copy your handle URL:
- open YouTube Studio and click Customization;
- on the Profile tab, scroll to Channel URL;
- click the copy icon next to the URL field;
- for the shareable handle URL (
youtube.com/@yourhandle), scroll up to the Handle section — the public URL appears directly below the handle field.
Legacy custom URLs in the form youtube.com/c/yourname from before the handle system stay live for older channels but are gradually phased out of YouTube's interface. New channels can't create them.
Key Takeaways
- Your @handle is directly searchable in 2026 — pick one that reflects your niche, not just your channel name.
- Channel banner dimensions per YouTube Studio: upload at least 2048×1152 pixels with all key text inside the central 1235×338 safe area; max 6 MB.
- The first 100 characters of your channel description appear in Google search snippets — use them to lead with your primary keyword and one-line pitch.
- Playlists on your channel page improve session watch time and signal topical authority to YouTube Search.
- A regularly active channel — uploads plus live streams — outranks one with sporadic uploads. Consistency is itself a channel-level ranking signal.
FAQ
What's the most important thing to optimize on a YouTube channel?
Three elements with the highest leverage: your channel description (the first 100 characters appear in Google), your @handle (directly searchable), and your featured sections (you control what new visitors see first).
Do YouTube channel tags help with SEO?
Minimally. YouTube has confirmed that channel tags carry very little weight in search ranking. Put your effort into keywords in your channel description, video titles and video descriptions instead.
How often should I update my channel page?
Refresh your channel banner and featured sections when your content focus shifts or you're launching a new series. Review your About section roughly every six months to keep keywords aligned with what you're actually publishing.
Does adding a channel trailer help growth?
Yes. A channel trailer under 90 seconds tends to lift subscriber conversion by 5–15% for new visitors. Show what you do, who it's for and why someone should subscribe, then cut everything else.